Chapter 5 - Tactile Navigation with Whiskers
In this chapter, you will build tactile switches, called whiskers, onto your BOE Shield-Bot and test them. You will then program the BOE Shield-Bot to monitor the states of these switches, and to decide what to do when it encounters an obstacle. The end result will be autonomous navigation by touch.Objectives/Outcomes:
By the time you complete this section you will be able to: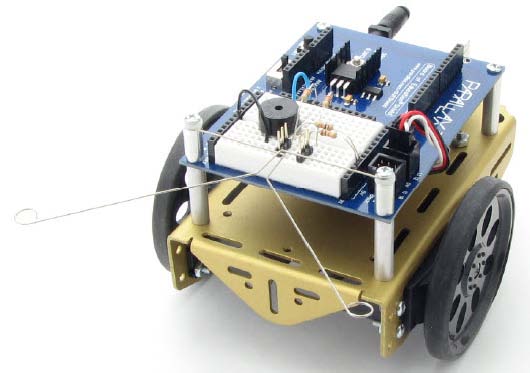
- Understand what sensors are and why they are used.
- Mount the tactile switches, called whiskers, onto the robot and test them.
- Understand how the robot knows when the whiskers have detected an obstacle.
- Connect the sensor circuit to the appropriate I/O register. Understand what type of electrical connection is made with the sensor.
- Understand how to check Inputs from sensors. Know what values to expect when the sensor detects an object and when it doesn’t.
- Create a circuit and the programming so that LEDs light up when the whiskers detect an object.
- Create a program to monitor the state of the switches, and decide what to do when the robot encounters an obstacle.
- Operate the robot with autonomous navigation by touch using the whiskers.
- Program the robot to detect corners, and decide what to do to get out of a corner.
- Write nested conditional statements in program code.
Assignments:
- View the videos and documents in the Overview section below.
- Read and follow the instructions in Robotics with the BOE Shield-Bot for Arduino Chapter 5.
- Download Chapter 5 Arduino Code
- Complete the BOE Shield-Bot activities assigned by your instructor, following the step-by-step tutorials and videos in the Activities section below. If self-study, do all the "Your Turn" parts for each activity in the chapter. (Note: It is only by typing in the commands that you truly begin to understand programming. So don't short change yourself.)
- Review the Key Points or FAQs below.
- Answer the questions in the worksheet document.
- Complete the Programming Exercises at the end of the chapter and fill out the worksheet for them.
- Complete the Projects at the end of the chapter and fill out the worksheet for them.
- Check your answers. When complete, turn in the Worksheet Doc to your instructor (print, email or other method defined by your instructor). Self-study students can optionally send to a parent, mentor or friend.
Overview
Activity 1: Build and Test the Whiskers
Tutorial - Step by Step Instructions
Activity 2: Field-Test the Whiskers
Tutorial - Step by Step Instructions
Activity 3: Navigation with Whiskers
Tutorial - Step by Step Instructions
Activity 4: Artificial Intelligence for Escaping Corners
Tutorial - Step by Step Instructions
Additional Resources
Arduino Coding Reference (Help for Arduino Code)
Key Points or FAQs:
What is a switch?
An electrical switch is any device used to interrupt the flow of electrons in a circuit. Switches are essentially binary devices: they are either completely on (“closed to allow electrons to flow”) or completely off (“open to break the circuit so electrons cannot flow”).
Why does a 0 mean the whisker switch is pressed, instead of a 1?
It was a decision made by an engineer when the whisker circuit was designed. The whisker circuits are wired for active-low output, which means that they each send a low signal 0 when they are pressed (active) and a high signal 1 when they are NOT pressed.
What does it mean if both whiskers show a value of 0 when only one is pressed?
Usually that means that your whiskers are touching each other. Try adjusting the connections so they don't touch. It can also mean that your circuit was not wired properly. Try checking the components and follow the wiring diagram and video carefully.
What is a breadboard and how do we use it?
Watch this Youtube video to find out.
--------------