|
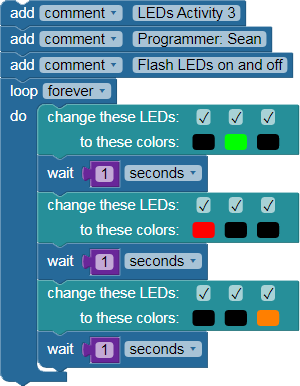
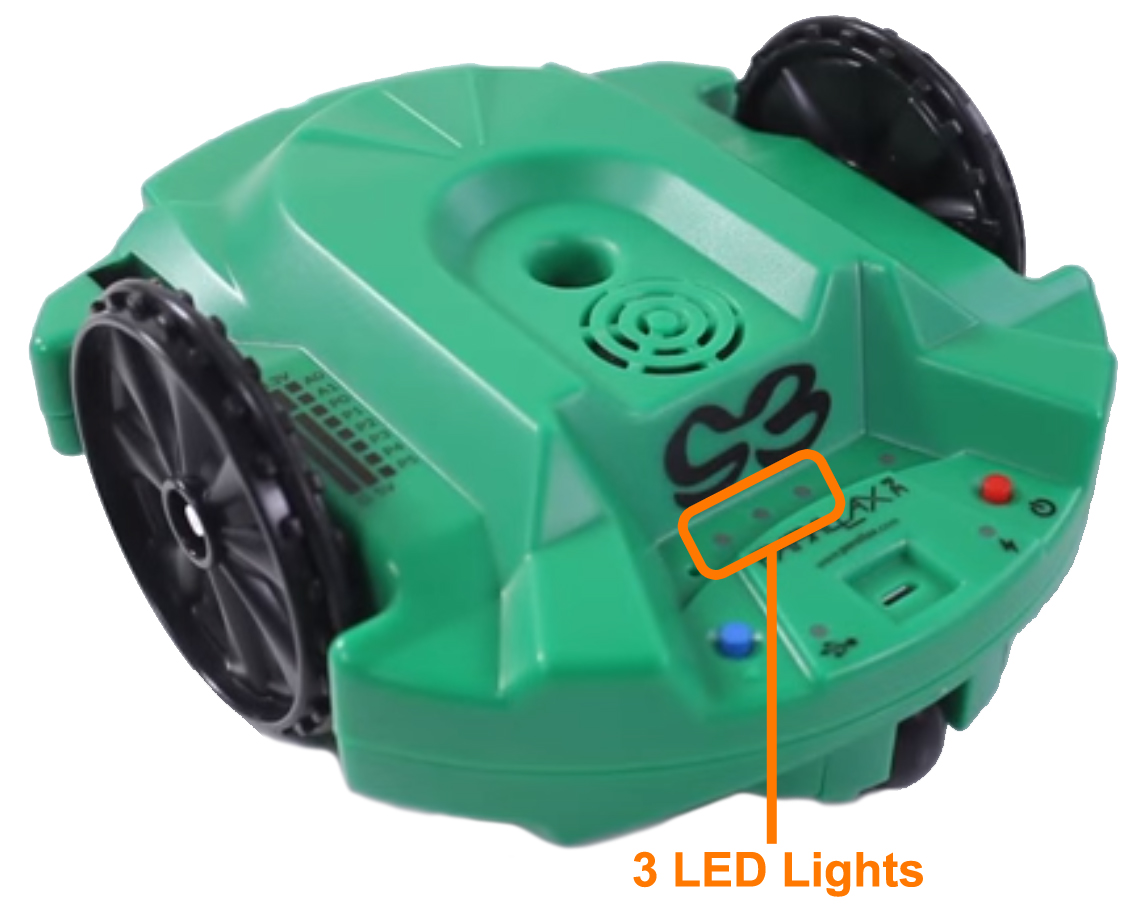
In these activities we will work with the 3 Lights on the Scribbler Robot. The lights, called L.E.Ds, can be turned on and off by using a special block in the BlocklyProp Editor.
Note: If you need to learn more about how to use the BlocklyProp Editor, review the Getting Started section to get more comfortable with basic navigation and block placement.
What is an LED? A light-emitting diode (LED) is a light source that is also a semiconductor. It emits light when voltage is applied to its leads (the wires that connect it to its power source - the battery).
We will be modifying the 3 bicolor indicator LED lights on the Scribbler. In this activity you will use code to turn on and off these LED lights. They are called bicolor because these lights can be changed to red, amber, green, or off. They are called indicator because they are indicating or letting us know about some condition in the robot. We will learn more about that as we learn coding. Let’s get to it!
Here's what we will do:
Pre-Activity Check List:
Each lesson will have a check list to make sure you have everything you need before you dive into the activities. We call this the Pre-Activity Check list. Before moving into the activity steps, make sure you have all items on the check list completed! These are also included in your Worksheet document. Please check them off there.
- Completed the Getting Started Lesson.
- Reviewed the lesson materials.
- Watched the concept and activity videos.
- Scribbler S3 Robot is fully charged (blue light is on).
- Scribbler is connected to a computer via USB cable and wheels are up in ‘garage mode’.
- Clear area to work with the Robot still connected to your computer.
- Started BlockyPropClient software on the computer, and pressed connect.
- Have https://blockly.parallax.com website open in Internet Browser and have logged in.
- Reviewed the LED Block Section of the Reference Guide Documentation
|
Activity 1 Steps:
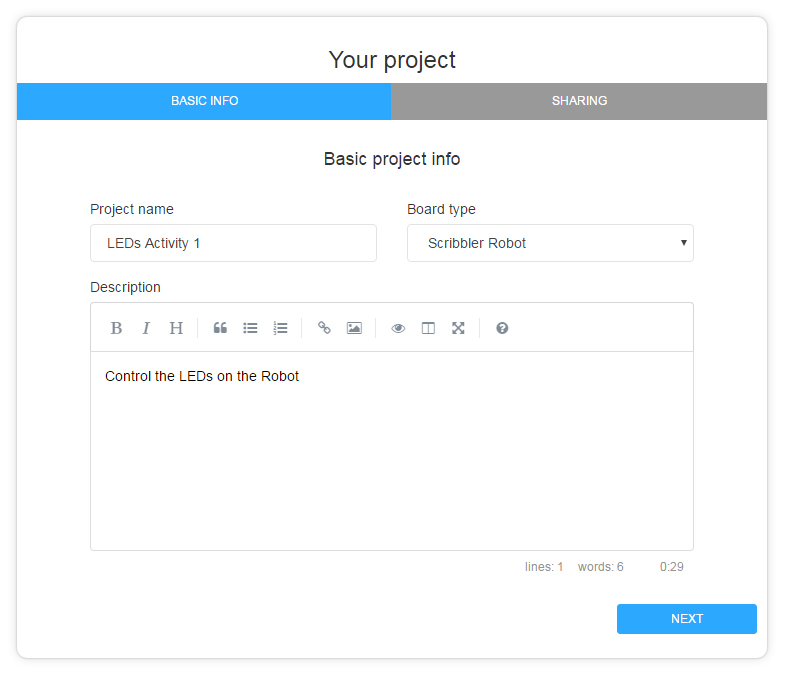
- Start a new project: Go to BlocklyProp in the Internet Browser. Click the menu in the upper right corner of the screen and select New Project.

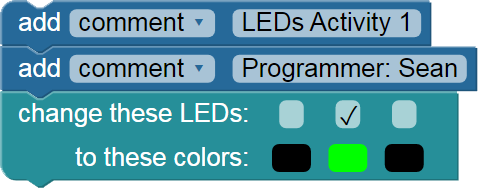
Type the Project name: LEDs Activity 1
Description: Control the LEDs on the Robot
Leave the sharing as Private, click on Finish.
-
- To modify the indicator lights, select Actions from the menu and Choose LEDs.
Let’s choose the block that says Change These LEDs and drag it into our worksheet.
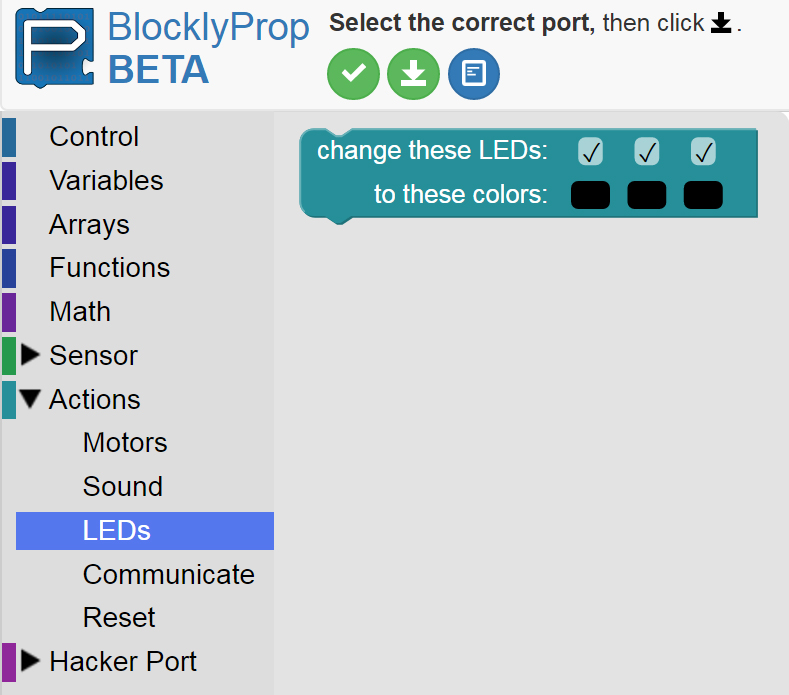
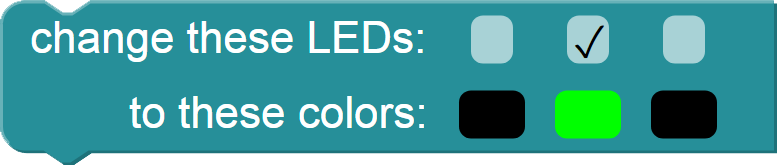
- We only want one LED to be on, so uncheck the right and left boxes, and only leave the center checked. Then select green for the color of the center LED.
- Save the Project. Now here is the exciting part, we get to copy the program from the BlocklyProp Editor to the Scribbler Robot.
- Make sure that the Scribbler is plugged into the USB cable and attached to the computer. Put the Scribbler in Garage Mode - with wheels up so they don't touch the table.
TIP: It’s a good idea to prop the Scribbler up so the wheels don’t touch the table. This will prevent the Scribbler from running away from you and falling off a table or desk!
- Turn on the Scribbler Robot and verify that the Blue Light is on. Then load the program onto the robot:
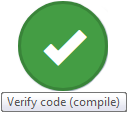
- Verify the project by clicking on the green circle with the checkmark on it.
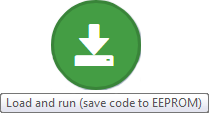
- Upload the program to the scribbler robot. by selecting the green circle with the down arrow on it.
- When the program starts copying from the Blockly Editor, through your computer, and onto the eeprom chip on the robot (or uploading as it is called in the programming world), you will see this message box:
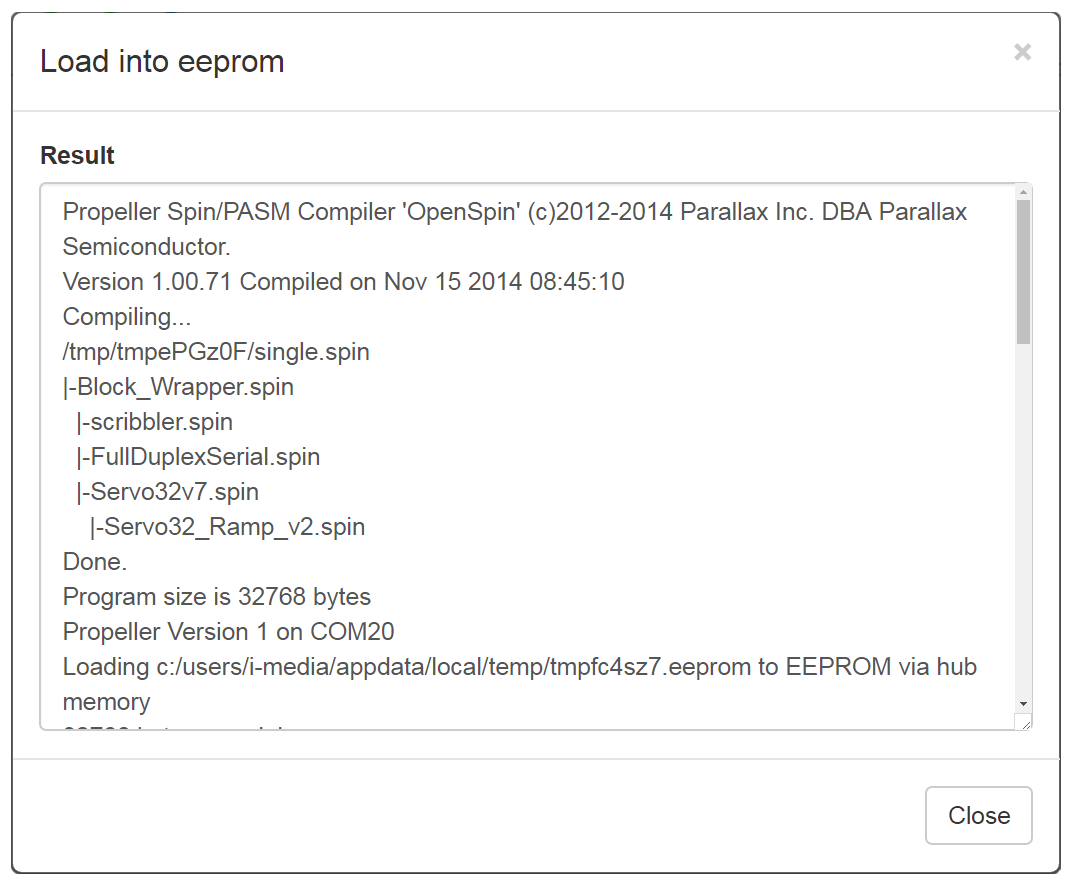
If everything goes as planned, you will see these messages at the bottom, with OKs.
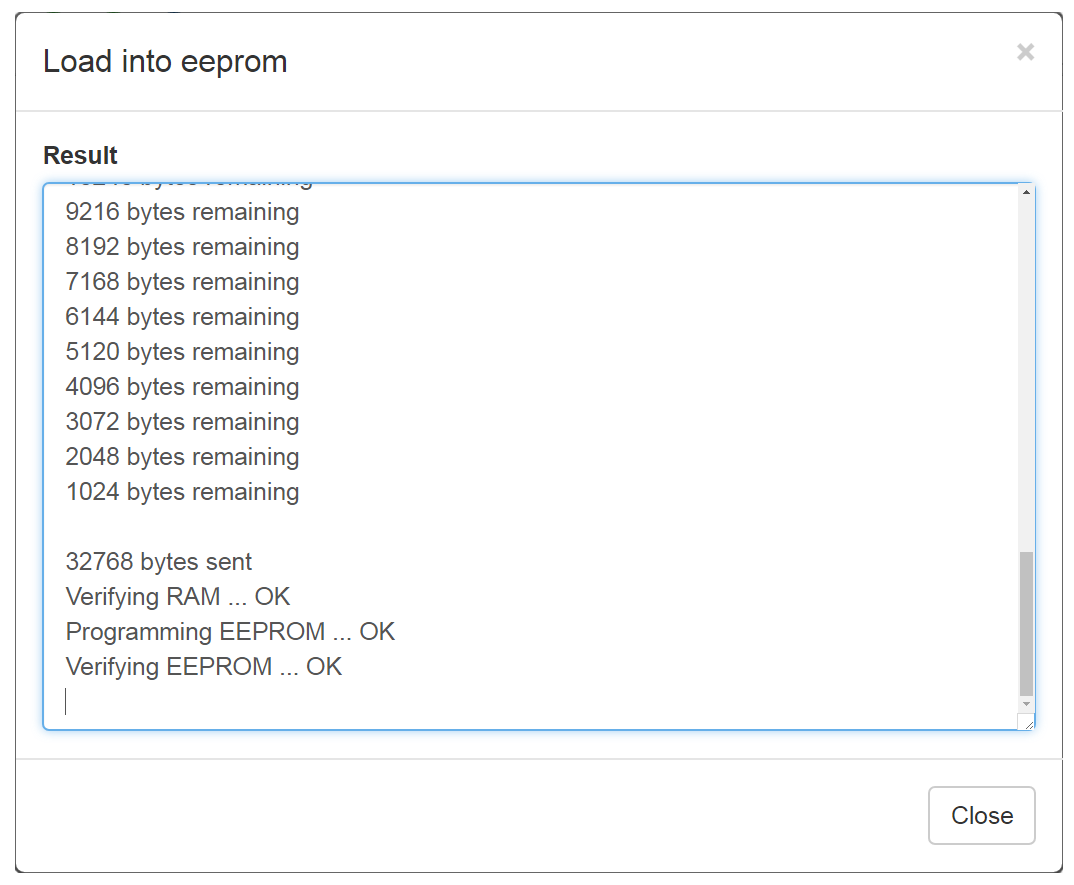
NOTE: If you get a different message, please visit the Troubleshooting section. Don’t worry, it is probably something very easy to fix!
- Now it is time to view the results of your first program! Look at the Scribbler, the Center Light should be lit and the Left and Right lights should be off; just like in the block we set. Congratulations, you’re a Robotics Programmer!
- Now let's go back and add some notes to our program.
-
Click Control
-
Choose Add Comment and Drag onto Worksheet
-
Connect it to the top of the other block
-
Type into grey area ‘LED Activity 1’
-
Add another Comment below first one and type “Programmer: “ and your name.
- If we want to modify or come back to this program at a later time, we need to save it. To save the project, click the “Save” button. (Note: you will know it saved if the button turns green and has a checkmark in it for just a moment.)
11. Next, save a copy of the program to the area on the computer were you are supposed to save your files (as directed by your instructor).
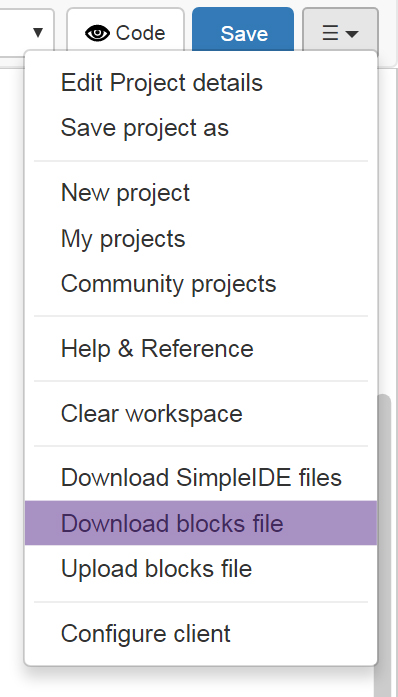
Click the menu in the upper right corner of the screen.
-
Then select Download Blocks.
-
Name the project as LEDsActivity1 and select comfirm to download it to your downloads folder.
-
Then open up your downloads folder and find the file named LEDsActivity1.svg.
-
Right click on the file and select cut, then navigate to the file area on the computer (or network) where you are supposed to save your files (as directed by your instructor), and select paste.
12. Fill out the worksheet questions for this activity.
TIP: Always be sure to name your projects something that you will recognize later, like “LEDActivity01.scb” or “LightsOn.scb.” Follow your instructor's guidelines for naming files and where to save your files.
|
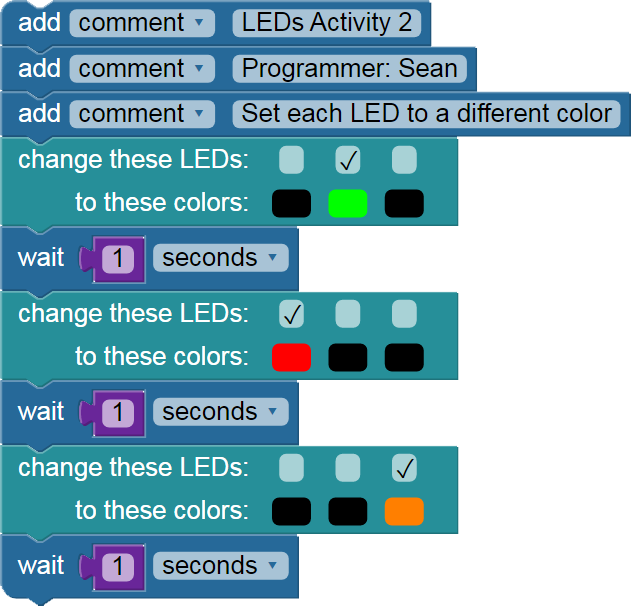
Activity 2 Steps:
- Start a new Project
- Project Name: LEDs Activity 2
- Board/Device type: Scribbler Robot
- Description: Set each LED to a Different color
- Sharing: Private
- Add comments to describe the project.
- Select Control, choose Add Comment and Drag onto Worksheet
- Type into grey area ‘LED Activity 2’
- Add another Comment below first one and type “Programmer: “ and your name.
- Finaly add another Comment below the second one and type in "Set each LED to a Different color"
- Add LED Block commands - duplicate them.
- Select Actions and LEDs. Let's choose the block that says Change These LEDs and drag it into our worksheet.
- Unselect the left and right check boxes and change the center color box to green.
- Right click on the LED Block and select Duplicate.
- In the copied block, unselect the center check box and select the left check box.
- Change the color of the left color box to red and chnage the center color box to black.
- Right click on the LED Block and select duplicate.
- In the copied block, unselect the left check box and select the right check box.
- Change the color of the right color box to amber and change the left color box to black.
- Add a pause between the LED blocks.
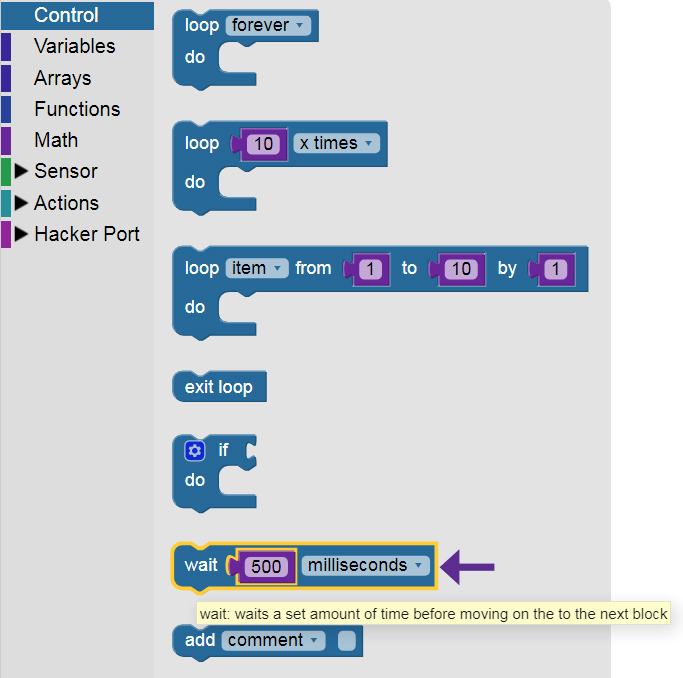
- Click Control, and choose the Wait block. Drag it onto the Worksheet and click it under the first LED block.
- In the Wait block, change milliseconds to seconds, then change 500 to 1, so it will wait for 1 second.
- Right click on the wait Block and select duplicate then place the copy under the second LED Block.
- Right click on the wait Block and select duplicate then place the copy under the third LED Block.
- Save the project.
- Upload and run the program on the Robot.
- Make sure that the Scribbler is plugged into the USB cable and attached to the computer (in Garage mode).
- Turn on the Scribbler Robot and verify that the Blue Light is on.
- Verify the project by clicking on the green circle with the checkmark on it. Verify code.
- Upload the program to the scribbler robot. by selecting the green circle with the down arrow on it. load and run.
- Watch the program run on the robot. Did it work as you expected? You can see it run again by pressing the Blue reset button on the robot.
- Make adjustments to the code blocks as necessary and repeat the save and upload steps until it works.
- Download the blocks file and copy it into the folder where you keep your files.
- Fill out the worksheet questions for this activity.
|