Activity 0 – Getting Started
Welcome to
Exploring Robotics with Scribbler: An Introduction to Programming Graphically
with Scribbler. In this activity we will
become acquainted with the Scribbler robot and the programming
environment.
The items that
we will cover are:
·
Battery
Installation
·
Connecting
the Scribbler to the Computer
·
Turning
Scribbler on and off
·
Scribbler
Program Maker startup and basic operation
At the
beginning, we have two sets of instructions here one for the Scribbler S2 Robot
(Red) and another for the Scribbler S3 Robot (Green). Please use the appropriate instructions. Then further down in the document (Part 3) the
instructions are for both robots.
S2 Robot (Red) Battery and Connect Instructions
NOTE: Only adults should install
batteries.
PART 1: Battery
Installation
Before we can
get started using the Scribbler Robot, we have to install the batteries so it
has power. The Scribbler S2 Robot (red)
uses 6 “AA” batteries. We recommend using rechargeable batteries. Before starting a lesson, make sure the batteries
are fully charged. Note: Make sure not
to mix non-charged AA batteries with charged batteries.
Important
Safety Note: Take a look at the batteries each
time you install them. If they are bulging, leaking, or discolored or HOT when
you remove them from the charger, then the battery is bad. Don’t use those
batteries, they could overheat. They need to be replaced with good batteries.
To install
the batteries:
Step 1: Turn the power
off
Slide the
power switch toward the rear of the Scribbler robot.

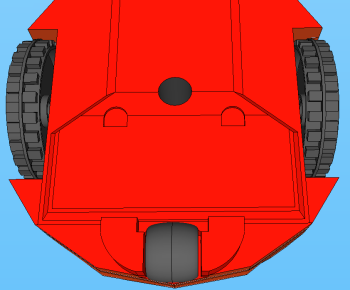
Step 2: Remove the
battery cover
Place the
Scribbler upside down on a non scratch surface, like
a notebook or textbook. Remove the battery cover by pulling the cover latches
down towards the tail wheel, then lift the battery cover up.
Battery Cover latches


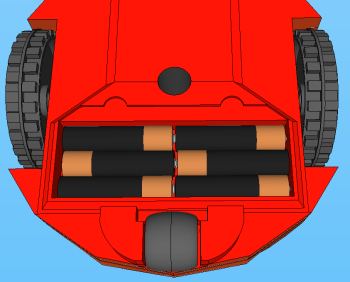
Step 3: Install
Batteries
Look at the
battery. If it is bulging, leaking, or discolored, then it is bad. STOP and do not use that battery. Get a replacement.
All batteries
have a positive (+) and negative (-) side.
The positive (+) side is the top side with the raised area. Follow the pictures in the battery
compartment and place the batteries.
Note: The bottom flat part of the battery will always go against a
spring.
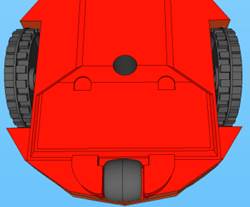
Step 4: Replace battery
cover
Place the
cover back into place by sliding the tabs into the slots on the robot first
then pushing the latches into place. If
it seems tights, don’t force it. Pull
the cover off again and make sure all the batteries are properly in their place
and try again.
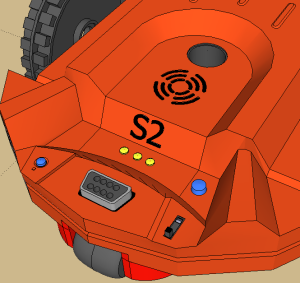
Step 5:
Turn on the Scribbler Robot
The power
switch is on the back, right side of the robot.
Slide the switch upwards and the Blue Power light will turn on.
Blue Power LED
![]()
![]()
NOTE: If the
batteries are low, the blue power LED will flash slowly. However, it is
possible there is not enough power in the batteries to program the robot even
if the blue light is NOT flashing. If
the robot is not acting like you think it should, then you might need to
recharge the batteries.
PART 2: Connect the
Scribbler Robot to a Computer/Laptop
In order to
program the Scribbler, it has to be connected to the computer.
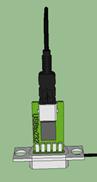 Step
1: Connect the cable to the circuit
board adapter
Step
1: Connect the cable to the circuit
board adapter
Plug the USB cable into
the USB to Serial Adapter (looks like a green circuit board). Only one end of the cable fits in the USB to
Serial Adapter.
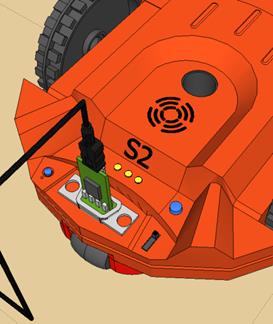
Step 2:
Connect cable to Scribbler Robot
Connect the USB to Serial
adapter to the Scribbler Robot. The
adapter will only fit one way. Look at
both ends (on the robot and adapter) and line them up and push the adapter on
to the port of the Scribbler until it is all the way on. No force is necessary.
 Step
3: Connect cable to computer
Step
3: Connect cable to computer
Connect the
other end of the cable to the USB Port on your computer or laptop
Your computer
should recognize that a new device has been connected. If the computer does not recognize the new
robot device, ask for technical assistance (support@parallax.com). You may need to download new device drivers. Be sure to tell them you have the Red
Scribbler S2.
S3 Scribbler Robot (Green) Battery and
Connect Instructions
NOTE: Only adults should install
batteries.
PART 1: Battery Installation
Before we can
get started using the Scribbler Robot, we have to install the batteries so it
has power. The Scribbler S3 Robot (green)
uses one lithium Ion battery, located inside the case. Before using the Robot,
make sure the battery is installed.
To install
the battery:
Step 1: Turn the robot
upside down
Place the
robot bottom side up on a towel or other non-slip surface (like a notebook or
textbook) on a table.
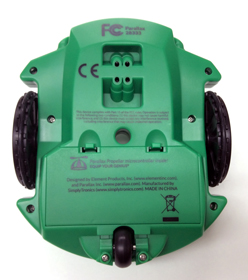
Step 2: Remove the
battery cover
Remove the
battery cover by pulling the cover latches down towards the tail wheel, then
lift the battery cover up.
Battery Cover latches


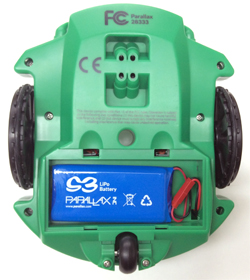
Step 3: Install Battery
Important Safety Tip: Look
at the battery. If it is bulging, leaking, or discolored, then it is bad. STOP and do not use that battery. Contact Parallax technical support
(support@parallax.com) for a replacement.
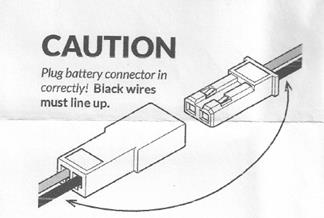
Connect the
cable on the battery to the connector inside the battery compartment. Line up the Black wires on each. Slide the
ends together until they click into place.
NOTE: DO NOT USE ANY
OTHER BATTERY OTHER THAN THE ONE SUPPLIED BY PARALLAX. YOU CAN DAMAGE THE
ROBOT!!
Step 4: Replace battery
cover
Place the
cover back into place by sliding the tabs into the slots on the robot first
then pushing the latches into place. If
it seems tights, don’t force it. Pull
the cover off again and make sure the cable and battery are properly in their
place and try again.
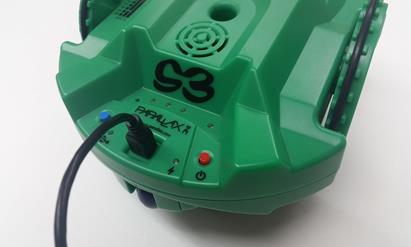
Step 5:
Turn on the Scribbler Robot
The power button
is the RED one on the right side of the robot.
Press down the red button and release it to turn the robot on.
USB Port LED

![]()

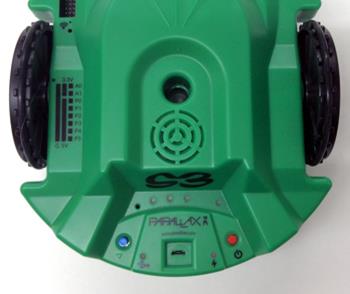
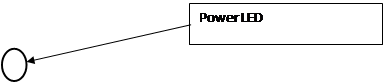
NOTE: When
the battery is installed, the Power Indicator Light (below the power button)
should be on, solid blue. If the
batteries are low, the blue power indicator LED will flash slowly. When the
robot is turned off, the Power Indicator Light is off.
However, it
is possible there is not enough power in the batteries to program the robot
even if the blue light is NOT flashing.
If the robot is not acting like you think it should, then you might need
to recharge the battery.
Step 6 Turn
off the Robot
Turn off the
Robot by pressing the Red button and holding it down for about 2 seconds.
Both Blue LEDs should turn off.
Step 7
Recharge the Battery
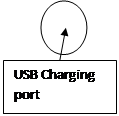
Connect the Robot’s
USB cable to a standard USB charging port (up to 2 Amp maximum charging
current) or to a computer USB port. Connect the other end into the robot’s mini
USB charging port. Turn off the Robot if it comes on when you plug in the
USB cable. Charging may take 2-3 hours with a 10 W USB wall adapter or
charger or 8-10 hours connected to a computer or 2.5W USB adapter.
Observe the
power and charging LED (to the right of the USB port).
- Solid Red indicates it is charging.
- Solid Blue indicates it is fully charged.
- Blinking red/blue means there is a problem. Check
the following: the battery may be disconnected or not plugged in
completely. Unplug the USB cable BEFORE checking the battery. After
checking the battery, wait a few minutes and then reconnect the USB cable,
turn off the robot, and begin charging again. If you get the same red/blue
blinking, there may be an issue with the battery. Contact Parallax
technical support (support@parallax.com) for a replacement.
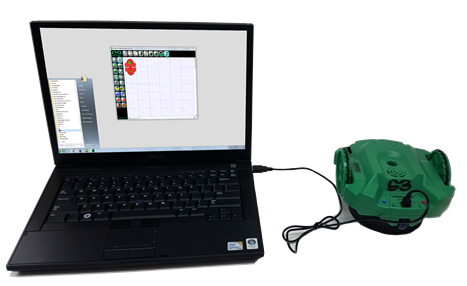
PART 2: Connect the
Scribbler Robot to A Computer/Laptop
In order to
program the Scribbler, it has to be connected to the computer.
Step 1:
Connect cable to Scribbler Robot
Connect the USB to cable
to the Scribbler Robot. Insert it until you feel it “click” into place.
Step 2:
Connect cable to computer
Connect the
other end of the cable to the USB Port on your computer or laptop. Your computer should recognize that a new
device has been connected. If the computer
does not recognize the new robot device, ask for technical assistance. You may need to download new device drivers.

-----------------------------------------------------------------------------------
THE REST OF THIS DOCUMENT IS FOR BOTH S2 (Red) and S3
(Green)
-----------------------------------------------------------------------------------
PART 3: Start the Scribbler Program Maker
The Scribbler
Program Maker is the software tool that you use to tell your Scribbler Robot
what to do. You will use the Program
Maker to create programs to transfer to Scribbler. The robot will then read your program and do
what you programmed it do.
Step 1: Start Scribbler
Program Maker
The desktop icon
for the Scribbler Program Maker looks like a small Scribbler Robot.
 Note: This software should already be
installed on your computer. If it is
not, ask for technical assistance. There are separate instructions for
installing the software.
Note: This software should already be
installed on your computer. If it is
not, ask for technical assistance. There are separate instructions for
installing the software.
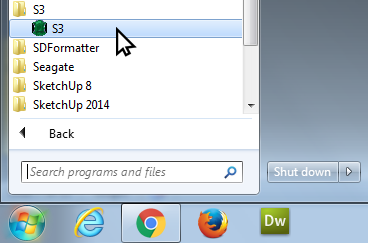
The program
is located on your desktop or in the start menu. To open the Scribbler Program Maker, double
click the icon, or select it from the folder in the Start Menu.
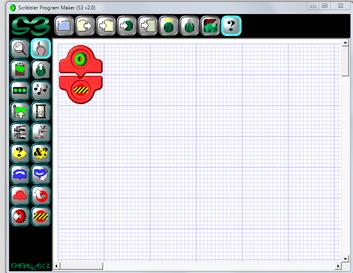
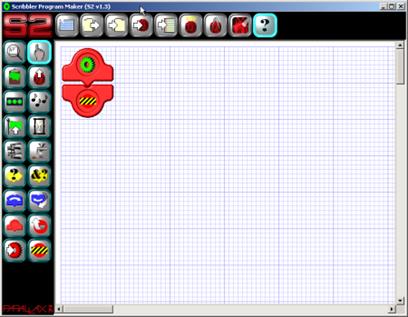
After you
open the program, you should see the Main Screen of the Scribbler Program Maker:
Step 2: Test the Scribbler
Communications
Before getting into the usage of the Scribbler Program Maker, we need to
test to see if the Scribbler Robot is connected properly and can communicate
with the software. Place the robot on
top of something so its wheels don’t touch the table (like a roll of tape or a
battery case). Then turn it on – the blue LED should be lit. Make sure the
cable is connected from the robot to the computer.
To test the
connection, click the “Restore Factory
Program” button at the top of the screen that looks like a little scribbler
with a yellow halo above it.

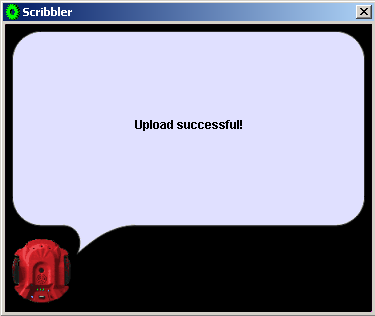
If the
connected is successful, you will see a screen like this:
If the
connection isn’t successful, you will see a screen like this:
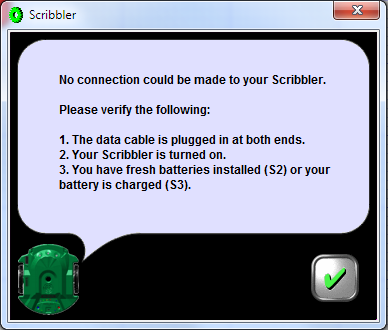
If you see
this screen, follow the instructions on the screen and view the troubleshoot
section at the end of this document to solve the problem.
Sending a
program to the robot
What is happening when the robot is connected to the computer?
When you
write a program, that program ONLY resides on the computer until you copy it to
the Scribbler Robot. Even if you save
your program, it will not be on the robot until you click the “Copy Program to Scribbler” button in the
Menu bar of the program maker. When the
button is pressed, the software converts your program into a language that the
Scribbler Robot understands. This is
called “compiling the code” in programmer’s lingo.
Then that
program is transferred from the computer’s USB port, over the cable to the
Scribbler Robot. Once the program has
been received on the robot, the robot will restart itself and run the program.
Every time
the robot is turned on or reset, it will run the program you downloaded on to
it. The only way to remove the program
is to copy a new program to the Scribbler or to Copy the Factory default
program to it by clicking the “Restore
Factory Program” button.
PART 4:
Start the Scribbler Program Maker
The Scribbler
Program Maker is a simple, but powerful tool used to make programs that the
Scribbler robot can understand. Using
this tool, you can make Scribbler move, play music, flash lights and observe
its environment.
Program
Areas:
There are 4
main areas in the Scribbler Program Maker
Action Bar Program Code Tiles Program Area Menu Bar
![]()

![]()
Menu Bar:
The Menu Bar
is the main control area that is used to program control. Items like open, save, new and the help
system are located here.
Program
Area:
The program worksheet
is the grid area where all the Action Tiles are placed. This is the only area where programs can be
created.
Program
Action Tiles:
In the
program area, Program Action Tiles are placed that tell the robot what to
do. All Action Tiles must be placed
between the red Tiles that are on a new sheet.
Action
Bar:
All of the
items on the Action Bar are items you can place in your program. Each Tile performs a task. There are actions Tiles for lights, music
moving, observing your environment and many more.
When you move
your mouse over each Tile, a short description of what the button does is
shown. To get a more detailed
description you can use the help button on the top right hand side. The details of how to move Tiles into the
program area will be covered in the first activity.
>>Update
the Lesson Worksheet with your observations.
If you are
having problems connecting the Scribbler Robot to the computer, or you keep
getting an error that says ‘No Connection could be made to your Scribbler,” try
the following solutions.
1) Check USB Cable Connections
Make sure the
cable is plugged completely into the USB port on the computer and also into the
port on the robot. It should click when
you insert the cable. (Note: The S2
Robot may have issues with the Adapter if it was connected and the robot moved and
pulled the cable. Try a different Adapter if you have one).
Also, on some
computer setups, using a USB Hub to connect multiple USB devices to a computer at
once can possibly create connection issues.
If you are experiencing issues, try to connecting the Scribbler directly
to the computer and not through a USB Hub.
2) Check that Scribbler is powered on
Before you
can download a program to the robot, it must be powered on. Place the robot on top of something so the
wheels are off the table (like a roll of tape) and turn it on. You will see the
blue power LED on if the power is on.
3) Check the Batteries
Check to see
if your batteries are charged. If the
batteries are low, the blue power LED will flash slowly. However, it is
possible there is not enough power in the batteries to program the robot even
if the blue light is NOT flashing. If
the robot is not acting like you think it should, then you might need to
recharge the batteries.
>>Update
the Lesson Worksheet with your observations.